EasyMenu 3: User's Guide
Contents
EasyMenu's home page
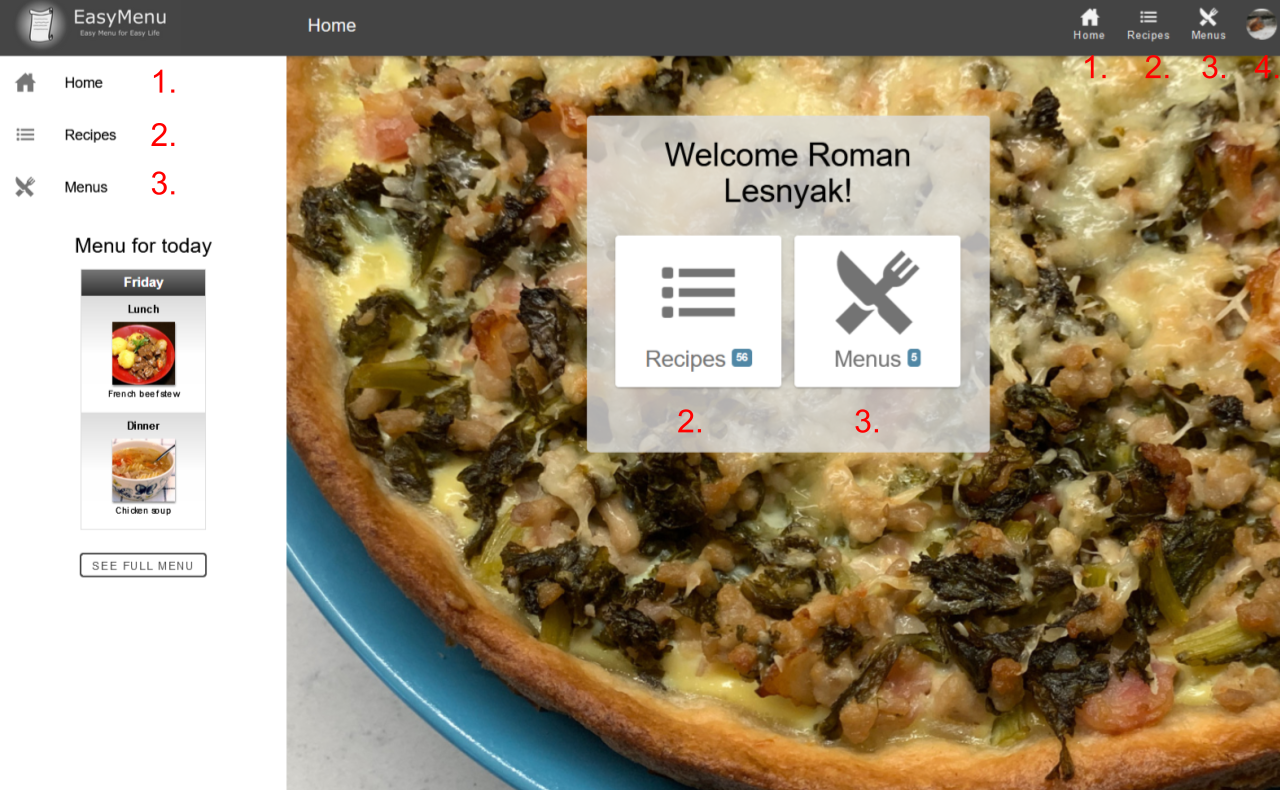
Home Page
This is the view you see when you log in each time.
You can always return to this view by clicking Home (1).
From here, you can navigate to the cookbook (2), the menu planner (3), or to the profile (4).
“Menu for today” tells you today’s menu.
Cookbook
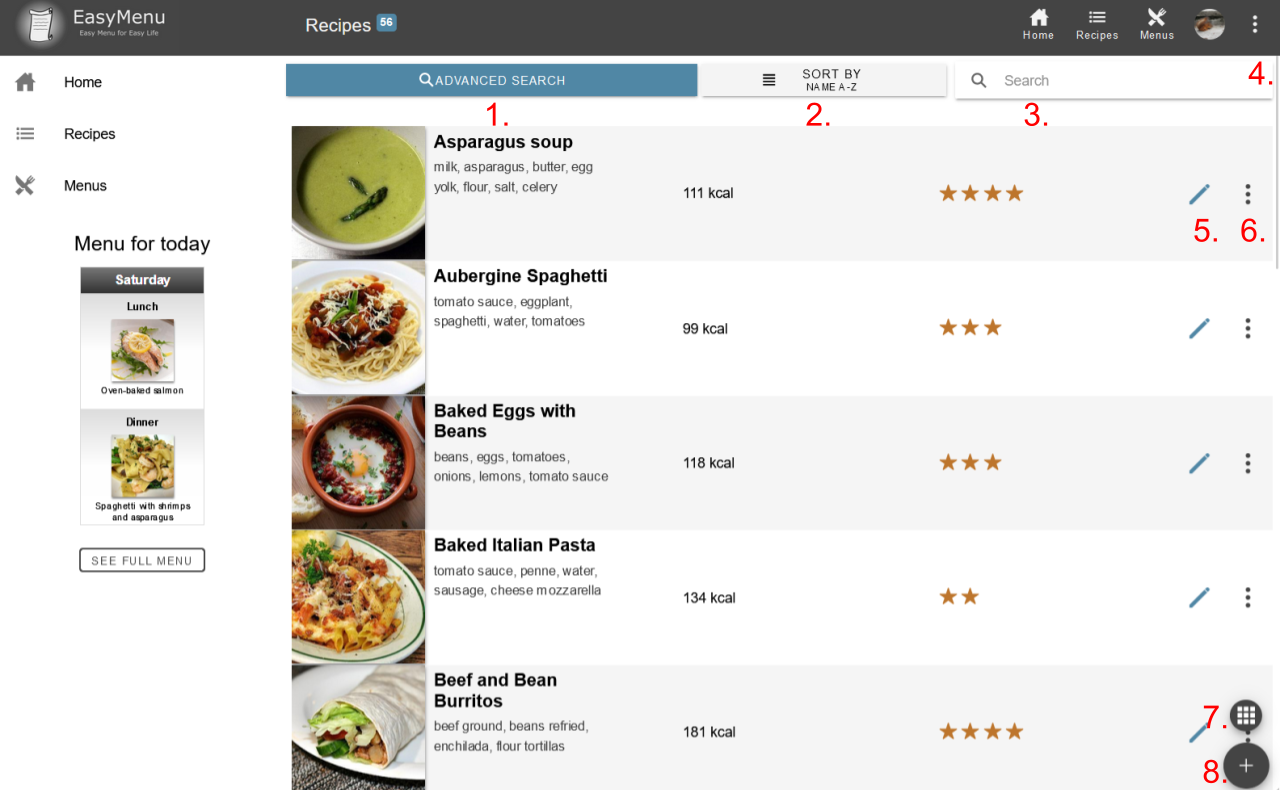
Cookbook Main View
- Advanced search. Advanced search options to find meals with specific attributes
- Sort by. How should the recipes be sorted?
- Search recipe by name
- Opens a selection of “Add from EasyMenu 2”, “Add from file” and “Delete several” (explained below)
- Edit recipes. Open the recipe editor
- A selection from two options pops up, “edit” and “delete”
- Toggle between how recipes are shown. Currently, list mode is enabled. By clicking, the mode will change to card mode
- Add Recipe. Open the window for adding a new recipe
Explanations for number 4:
Add from EasyMenu 2:
Port your data from EasyMenu 2 to EasyMenu 3
Select a zip file containing EasyMenu 2 backup data
Add from file:
If you have a zip folder that contains recipe data (made in settings step 7),
select the folder containing the data, and EasyMenu will load the recipes found in the folder.
NOTE 1: If done from cookbook view, will load only recipes. If done from the menu view, it will load menus.
To load all other data, see settings step 8.
NOTE 2: doesn’t ignore duplicates, only settings step 8 ignores duplicates!
Delete several:
Select recipes to delete
Delete them by clicking the red button in the bottom right corner
When done, click “Done” in the top right corner
Add Recipes
Adding recipes is simple, here's a quick tutorial explaining the process
Edit Recipes
Watch the video above in the add recipes section
Advanced Search
EasyMenu 3 has an advanced search to search by all different kinds of metrics.
Watch this short tutorial to better understand what it's all about
Menu Planner
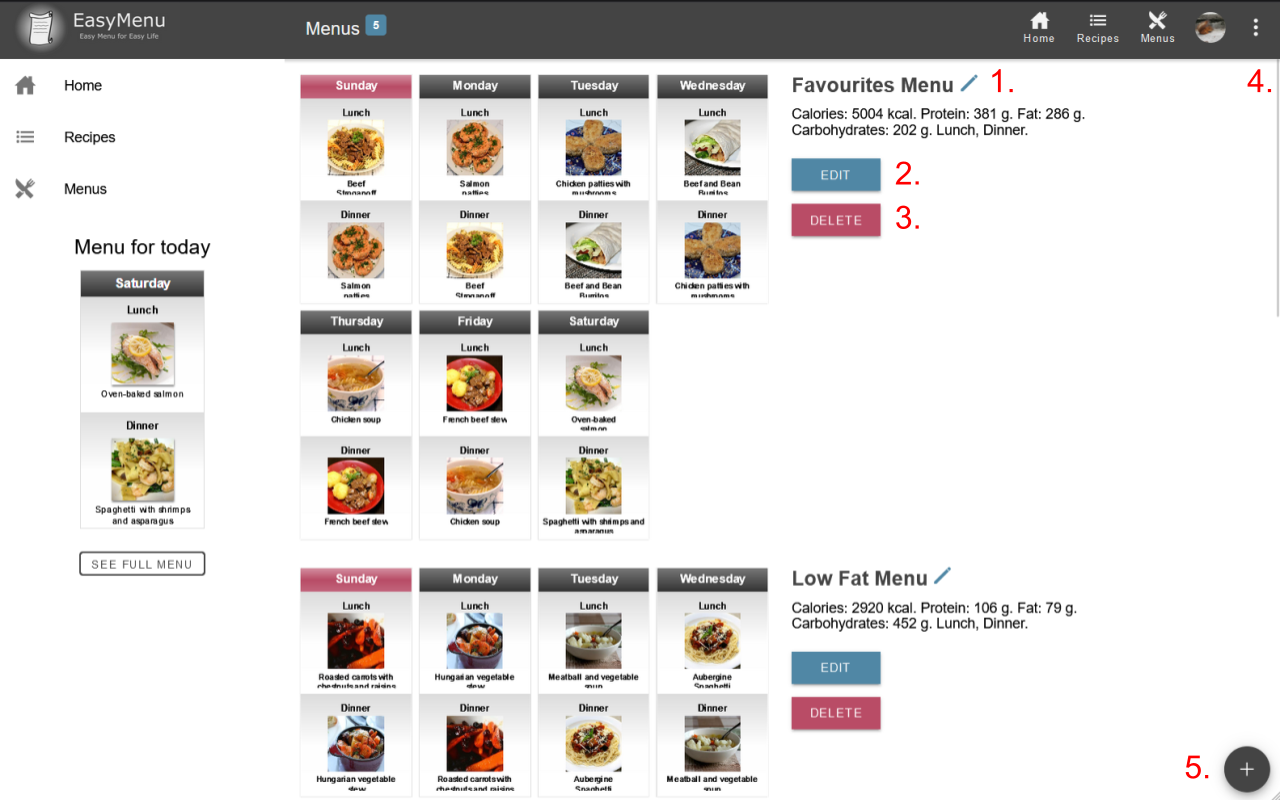
Menu Planner
- Edit the menu’s name
- Edit the menu
- Delete the menu
- Covered in Cookbook section 4.
- Create a menu
Create a Menu
Here's a tutorial going through the process of creating your first menu
Custom Properties
Custom property can be used in menus as a placeholder for something, just like random.
You can select conditions based on which meals will be selected.
Create custom properties from the profile view or when selecting recipes (the add icon next to random and leftovers)
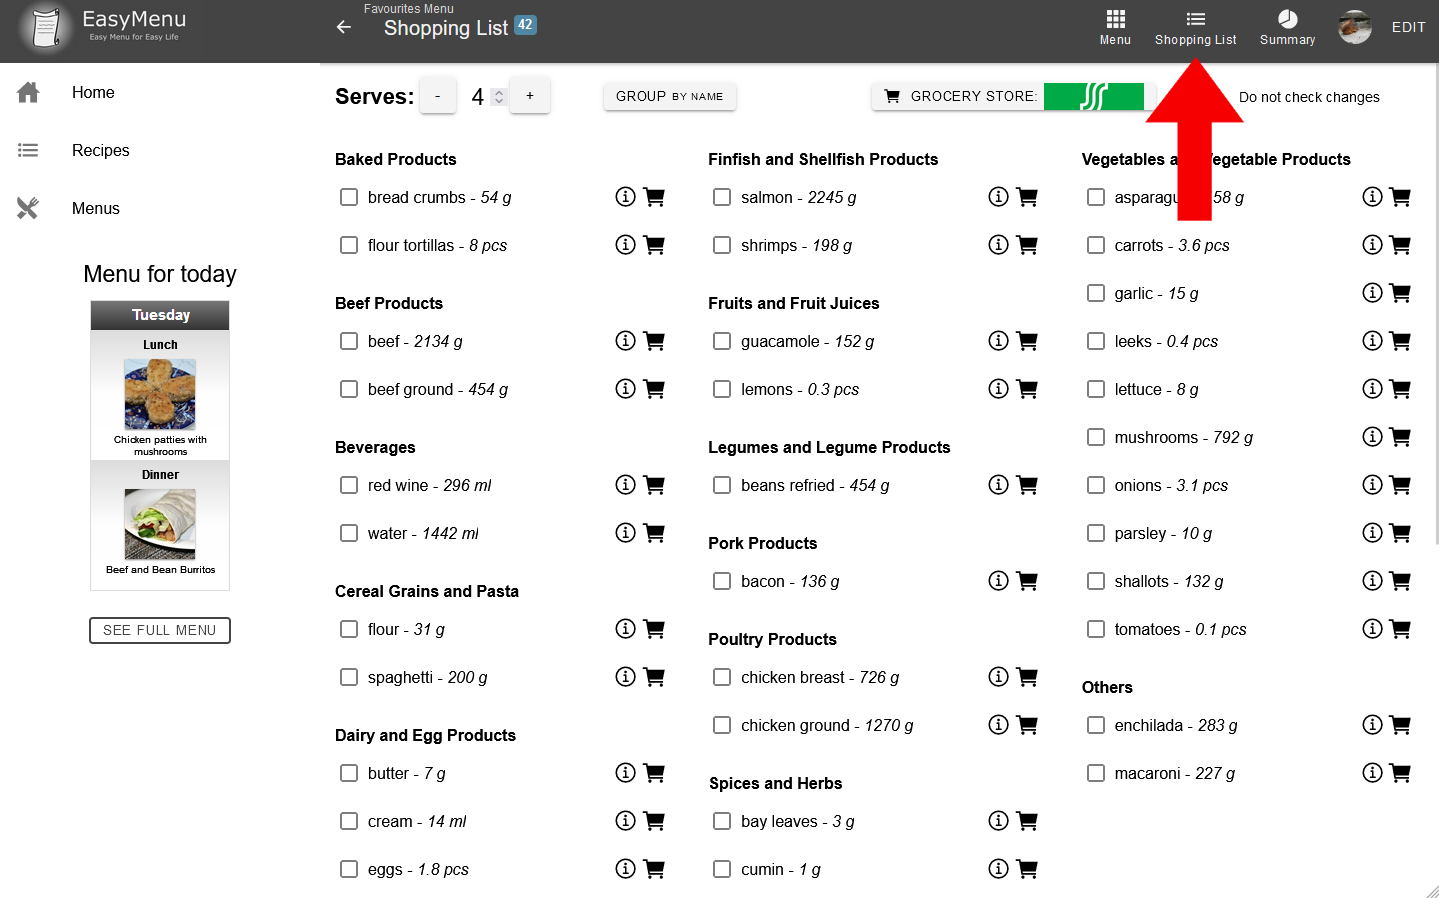
Shopping List
After entering the menu view, you'll see the shopping list button.
The shopping list is automatically generated
Menu Planner
Menu Summary
See different nutrition facts about your menu: the average daily protein, fat, calories, carbs...
Also shows meal specific nutrient information when scrolling down
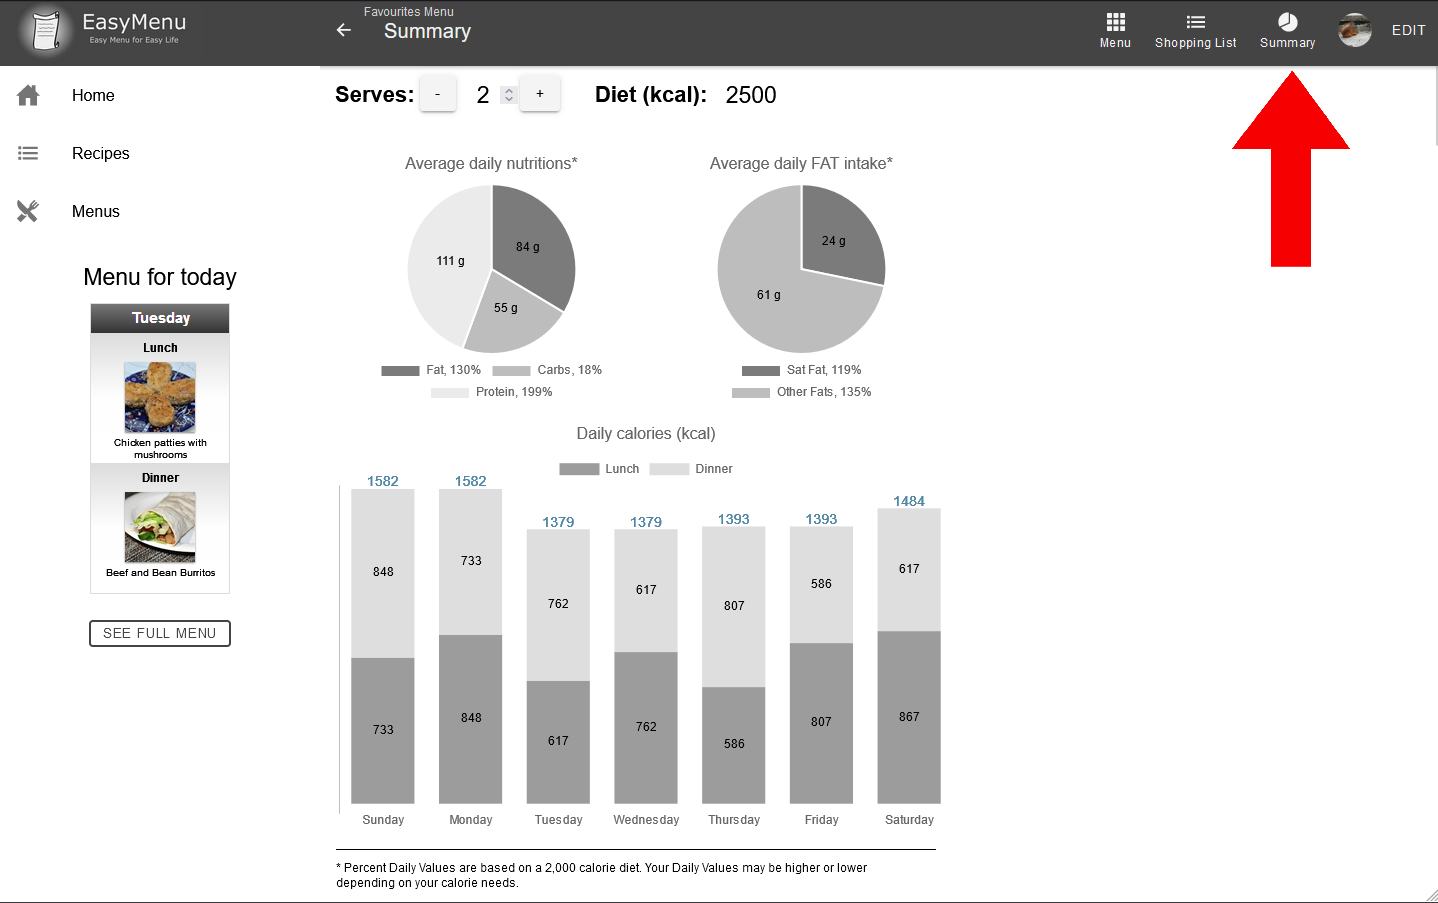
Different analytics about your menu
Profile
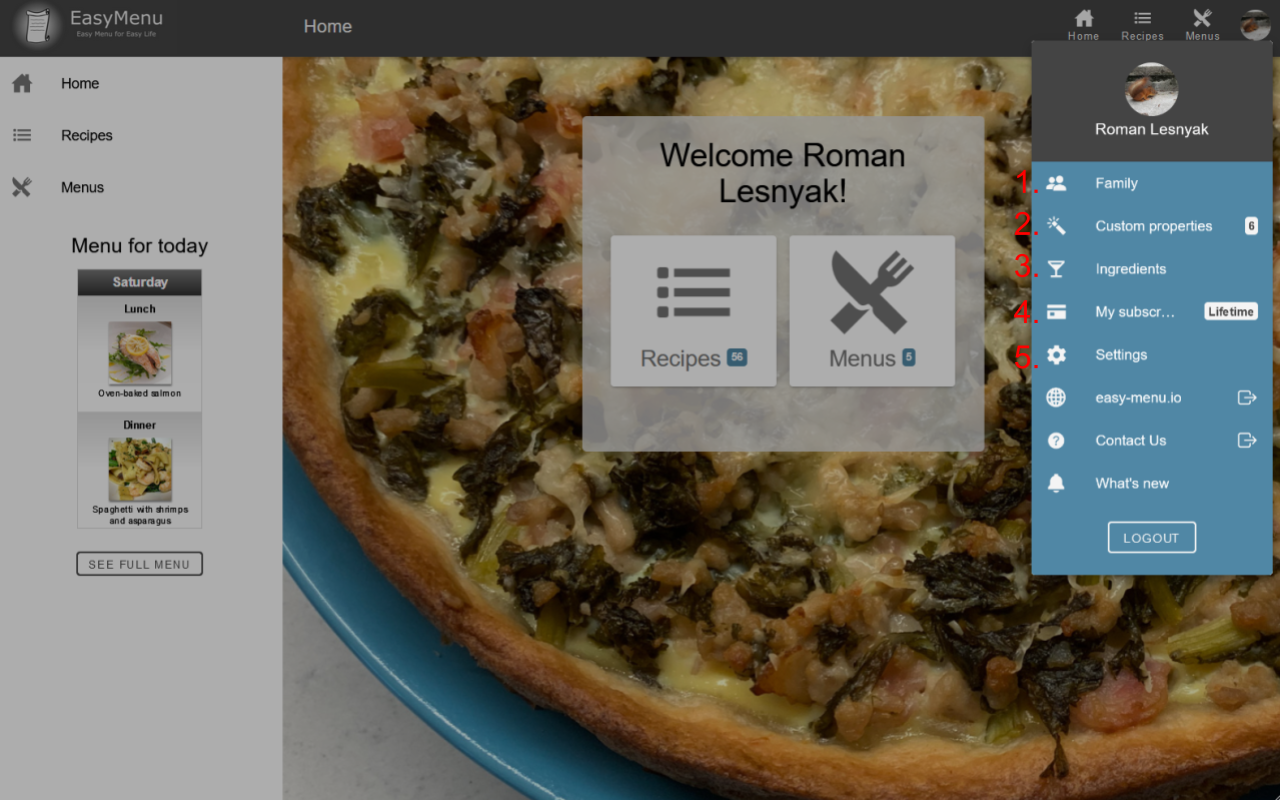
The Profile Dropdown
- Family. Add your family members and specify how many servings they eat
- Edit your custom properties
- See all your added ingredients
- Your current subscription
- The settings page
Settings
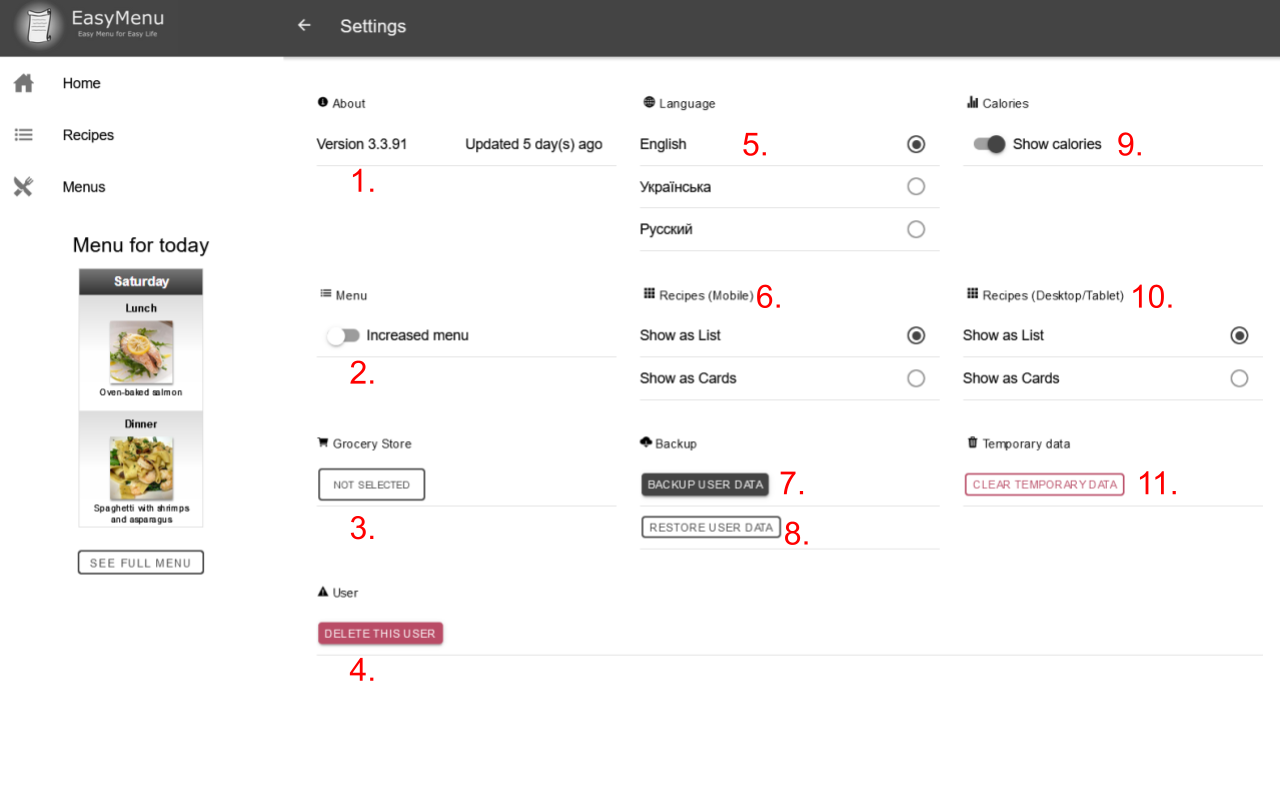
EasyMenu Settings
- The current version you're using
- Make the recipe icons bigger in the menu view
- Grocery store: When buying groceries, the online store you’ll be ordering from
- Delete user: Deletes the user
- Change the language
- Recipes view on mobile: List or Cards
- Backup user data: You’ll select what data you want to backup, and will download a zip file.
- Restore user data: Load data from a file, being able to select what you want to download from the file. Select a zip file.
- Show nutrient facts on recipes?
- Recipes view on desktop: List or Cards
- Clear temporary data